Controller Port Repair Kit for Sega and 50 similar items
Free Shipping
Controller Port Repair Kit for Sega Dreamcast Console (with Capacitor + Battery
$29.95
(It may be possible to pay only $26.95 instead of $29.95 when you
use your bCredits at checkout)
Sign up and get $5.00 bCredits free to use at checkout and another $5.00 bCredits when you make your first purchase. More info
Share & earn! Sign in, share this or any listing, and you’ll get commission when it sells.
Learn more
View full item details »

Shipping options
Seller handling time is 2 business days Details
FREE via Unspecified shipping type to United States
Offer policy
OBO - Seller accepts offers on this item.
Details
Return policy
None: All purchases final
Purchase protection
Payment options
PayPal accepted
PayPal Credit accepted
Venmo accepted
PayPal, MasterCard, Visa, Discover, and American Express accepted
Maestro accepted
Amazon Pay accepted
Nuvei accepted
View full item details »
Shipping options
Seller handling time is 2 business days Details
FREE via Unspecified shipping type to United States
Offer policy
OBO - Seller accepts offers on this item.
Details
Return policy
None: All purchases final
Purchase protection
Payment options
PayPal accepted
PayPal Credit accepted
Venmo accepted
PayPal, MasterCard, Visa, Discover, and American Express accepted
Maestro accepted
Amazon Pay accepted
Nuvei accepted
Item traits
| Category: | |
|---|---|
| Quantity Available: |
-1 in stock |
| Condition: |
Unspecified by seller, may be new. |
| grams: |
57 |
| weight: |
2.0 |
| Weight Unit: |
oz |
| Title: |
Default Title |
Listing details
| Seller policies: | |
|---|---|
| Shipping discount: |
Seller pays shipping for this item. |
| Posted for sale: |
January 19 |
| Item number: |
1692874368 |
Item description
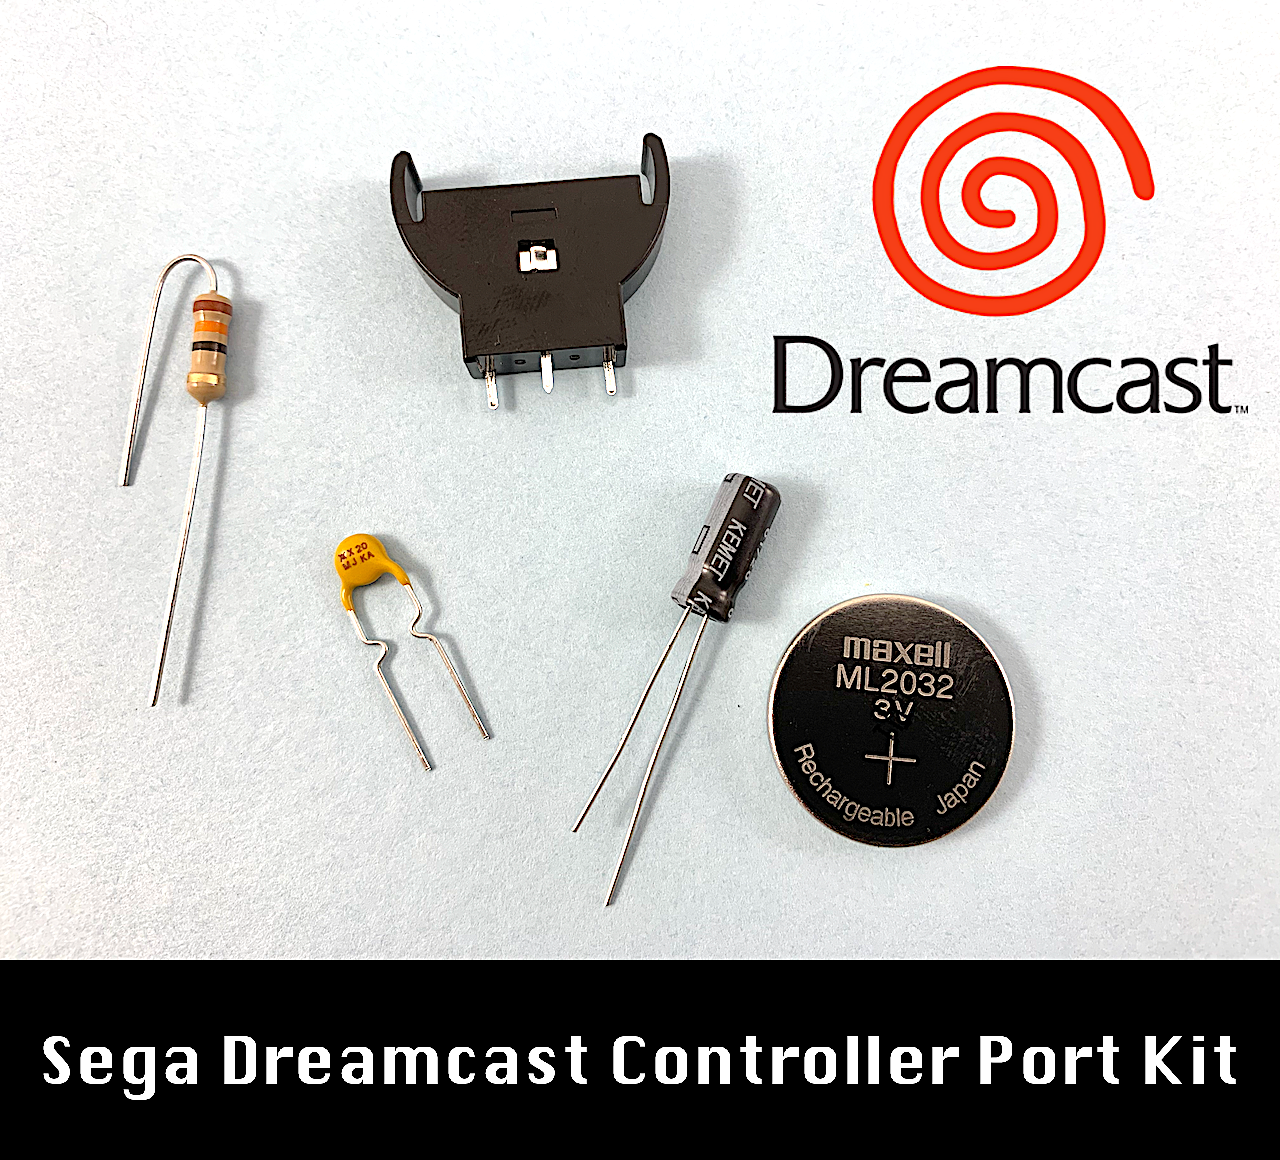
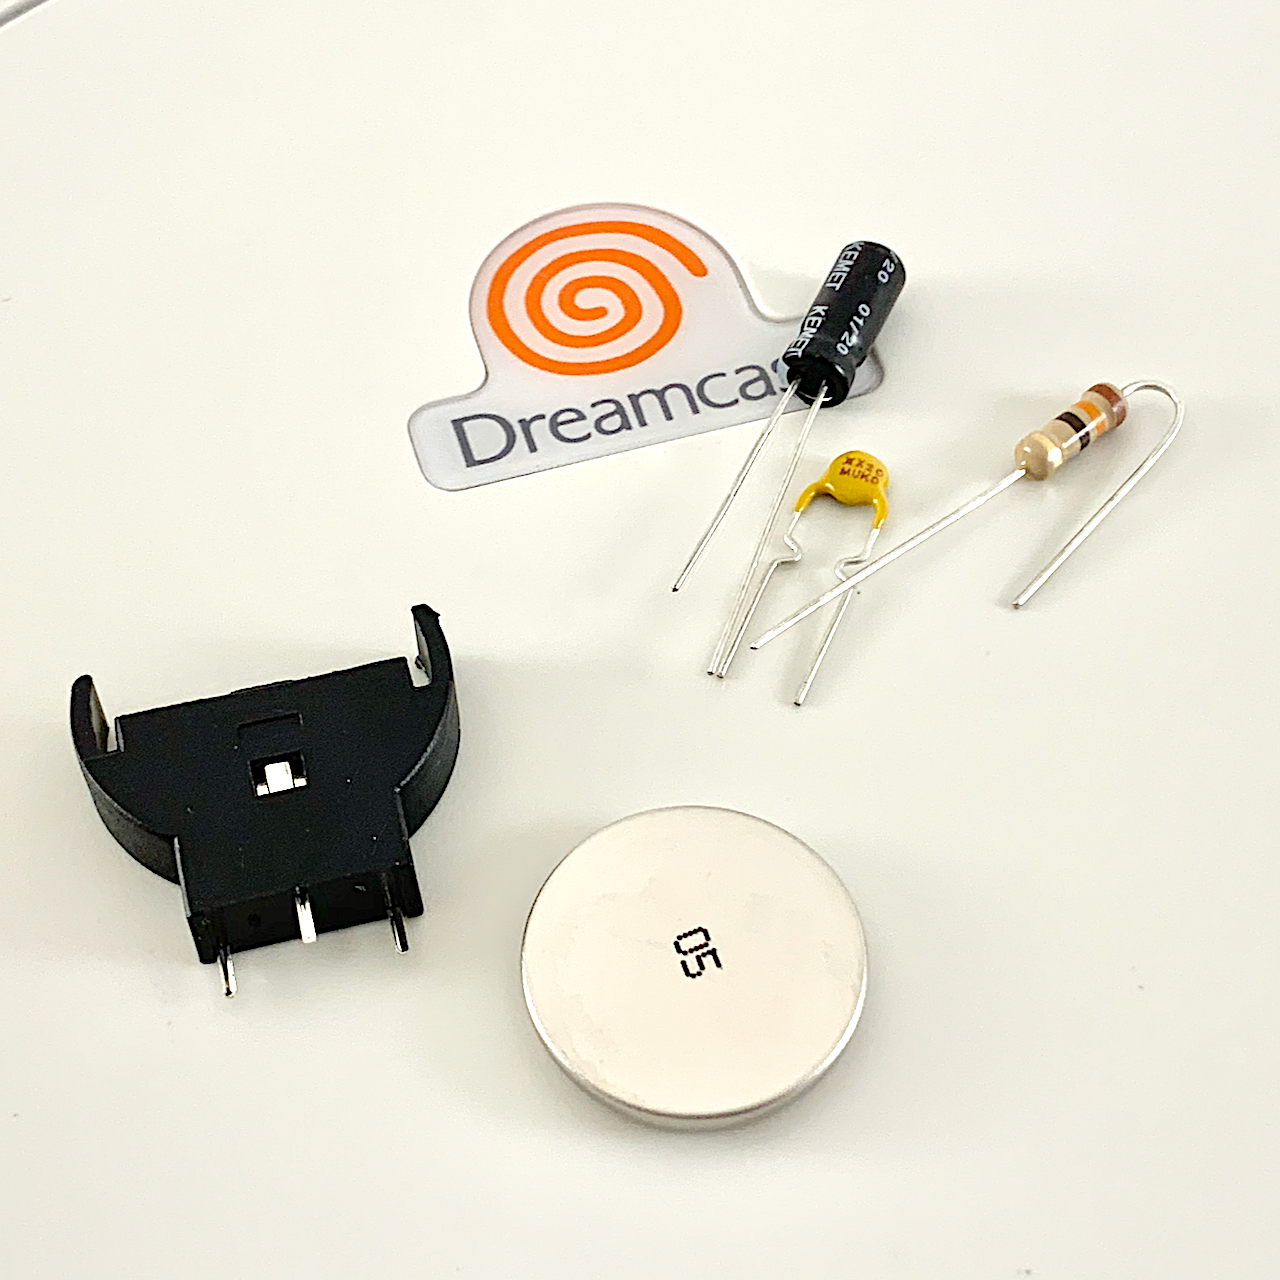
Product Details:
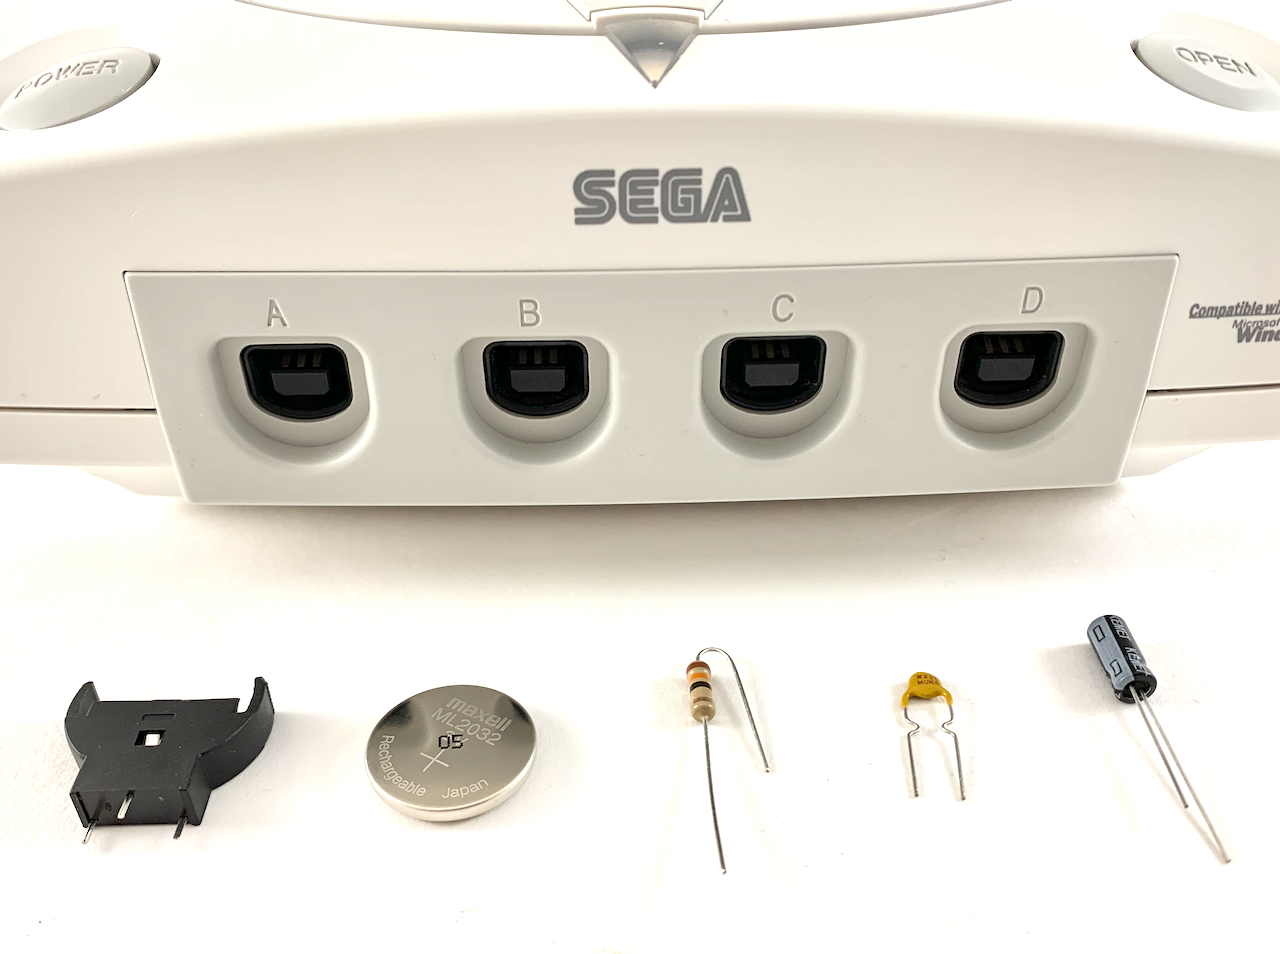
This is a kit for your Sega Dreamcast's controller PCB board to fix your controllers not working.
Included are high quality components: CR2032 battery, a vertical battery holder, fuse, capacitor, resistor, diode, and LED color of your choice.
Battery:
This will contain a brand new CR2032 battery, and replacement battery holder. The original battery is soldered in, so this will make replacing the battery in the future much easier.
There are two positive terminals and one negative, desolder the original battery, and solder in the new battery holder. Take precaution, as the legs are thin to fit the holes of the PCB board and they bend easy.
The CR2032 battery in this kit is a 3V battery, which matches the same voltage of the original coin battery. Never use a coin battery that has a different voltage rating other than 3V. You don't need an ML variant, this works just as good.
Diode:
A diode will be included in this kit. This is to be soldered to the resistor to block the recharge path from the CR2032.
The specs are: BAT85, 30V, 200MA, DO34
Polarity matters! The black ring on the diode goes closer to the PCB, the orange part goes closer to the resistor!
Fuse:
A blown fuse is the main reason why the controller PCB board is dead. The original fuses that Sega used were not "resettable", meaning once blown, they are dead forever. The fuse included in the kit is resettable, meaning it will last forever even if blown.
The specification is 72V 400mA.
It does not matter the orientation when you solder this in.
Capacitor:
These are less prone to failure, but a good idea to replace if you are working on the PCB board anyways.
The specification is 47uF 10V.
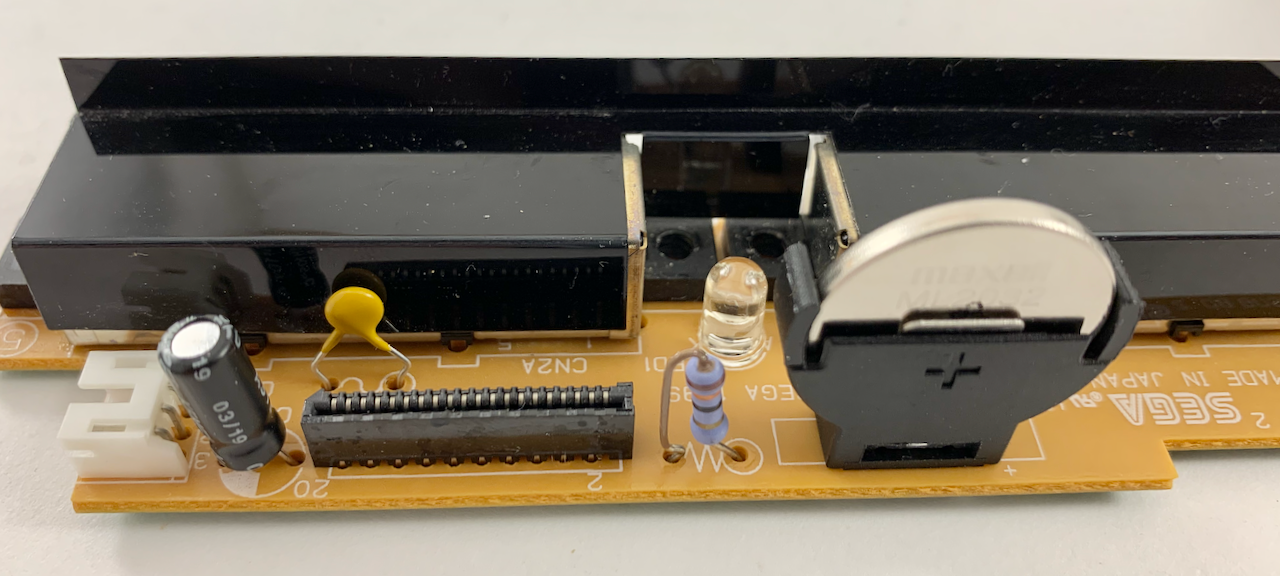
The orientation matters! There is a white strip that goes along the capacitor that must go with the white spot on the PCB board. In addition, there is a solder point in the middle that must be there!
Resistor:
Similar to the capacitor, this should be replaced to preserve the longevity of the PCB board.
The specification is 13 OHM 1/2 Watt 1% tolerance. Beware of those with 5% tolerance, this 1% variant is superior.
The orientation does not matter, in the original design the resistor is closer to the battery holder, I usually keep it that way. I have mixed up the orientation in the past by mistake and it did not make a difference.
LED:
These are 5mm and look fantastic in the Dreamcast. I did notice that the UV one is somewhat dim. If you have a translucent aftermarket case, this is a nice addition. Match the LED with your favorite color controller why not!
The orientation matters. The longer leg is called the anode, the shorter leg is the cathode.
If looking at the board where the parts from left to right are: capacitor, fuse, resistor, battery. Then the cathode (shorter leg) is to left, the anode (longer leg is to the right). I highly suggest taking a photo of the original LED's orientation to avoid confusion.
A blue LED will be included by default if you do not state a color in the checkout notes or message me afterwards.
Misc Notes:
What happens if you mess up?? Let's say you rip a pad clean off: look on the underside of the PCB board, everything traces back to the ribbon. So let's say you messed up on the LED? You can solder in a small wire that goes from one leg of the LED where you messed up, to one of the points of the ribbon area. Please be very careful with this, as you can destroy your Dreamcast if you wire points incorrectly! I have done this successfully with an LED and battery. I am not too sure about the fuse, cap, or res.
I find the solder on some boards to be very stubborn, I have no idea why. Always apply new solder to the points before doing a desolder. I have done boards that this is not completely necessary, in this case IT IS. Use a solder sucker in conjunction with copper braid. Put a small bit of flux on the tip of the braid, it will make the desoldering process way easier. If you have one of those expensive Hakko desoldering tools, then you probably are a golden god of soldering and don't need to be reading any of this.
This is to be considered a semi-professional job. If you have minimal experience, this is not the job for you. I am pretty dang good at soldering, and these boards still annoy the heck outta me! Once you get the old solder and old components off, it is smooth sailing, but up until that point you may tear your hair out trying to desolder the components! The pads are also very sensitive and can be ripped easy.
If you need help, ask away! Purchase this with peace of mind knowing you are buying from someone who has extreme experience soldering these in.
|
Why are we showing these items?
Booth
German Audio Tech, LLC. |

|

 MINIATURE LIGHT BULB LAMPS for 80's 90's BMW MERCEDES RADIO CASS... - $12.95")


 PORSCHE RADIO REMOVAL RELEASE TOOL KEY SET for FACTORY... - $9.95")


-
Refine your browsing experience
We can show you more items that are exactly like the original item, or we can show you items that are similar in spirit. By default we show you a mix.


 VOLKSWAGEN VW AUDI RADIO REMOVAL RELEASE TOOL KEY SET for ... - $7.95")

 - $5.75")


 New Bulbs Lamps for Mercedes-Benz CM2294 CM2396 Radio Cassette Displ... - $14.95")
This item has been added to your cart
 Controller Port Repair Kit for Sega Dreamcast Console (with Capacitor + Battery added to cart.
-1 available in stock
Controller Port Repair Kit for Sega Dreamcast Console (with Capacitor + Battery added to cart.
-1 available in stock
View Cart or continue shopping.
 Please wait while we finish adding this item to your cart.
Get an item reminder
We'll email you a link to your item now and follow up with a single reminder (if you'd like one). That's it! No spam, no hassle.
Already have an account?
Log in and add this item to your wish list.